Pre writing strokes are the first real step towards handwriting, and they are the step most of us skip. Hand a three-year-old a pencil and a page of dotted A, B, Cs, and there's a good chance you'll get ten minutes of wriggling, one snapped crayon and a page that looks like an ant walked across it in muddy shoes. If that's happened in your home, relax. Your child isn't "behind". They've simply been asked to jump a step.
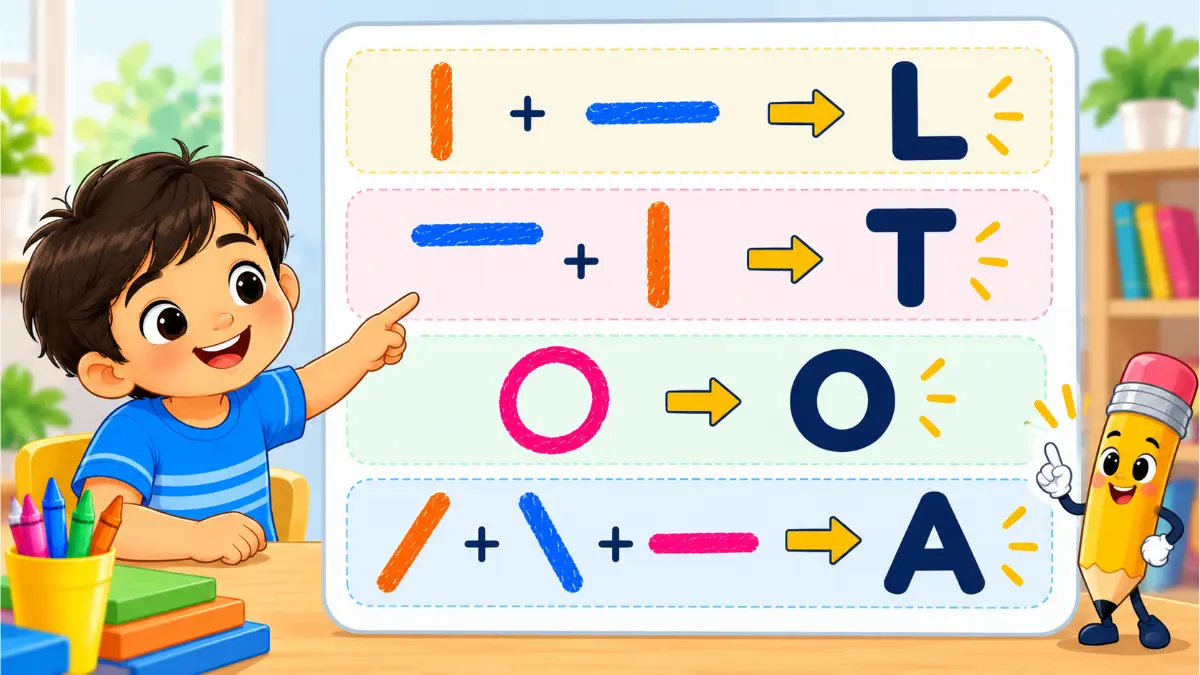
That missing step is pre writing strokes – the basic lines and shapes a child needs to control before letters make sense to their hand. Look closely and every letter is built from them. A capital A is two slanting lines with a line across. An O is a circle. A T is a line down with a line on top. Once these strokes feel easy, learning the alphabet stops being a fight.
In this guide we'll walk through the nine pre writing strokes in the order children usually learn them, the rough age for each, simple ways to teach them at home or in a Nursery, LKG or UKG classroom, the mistakes we see parents make most often, and the free printable worksheets on Kidzolearn that fit each stage.
Quick takeaways (for busy parents)
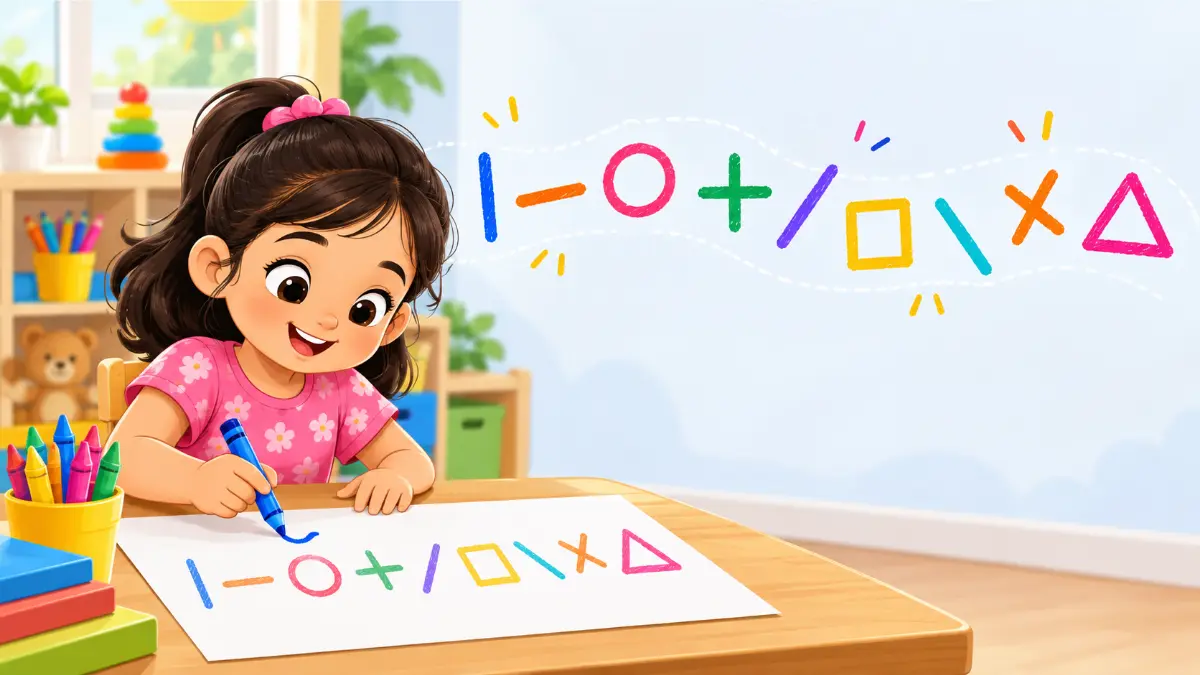
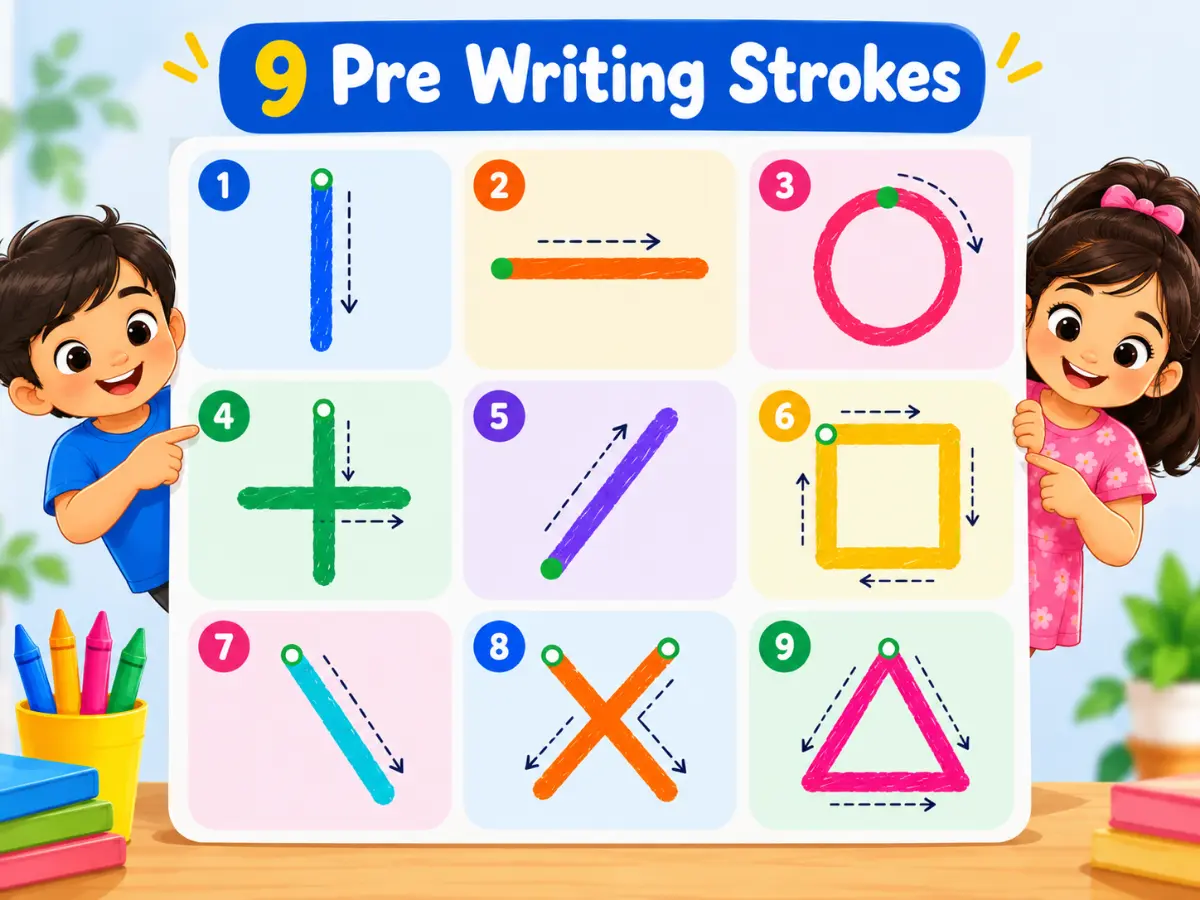
- The 9 pre writing strokes: | — ○ + / □ \ X △
- They usually appear between 2 and 5 years. Ages are ranges, not deadlines.
- Teach big to small: whole arm, then finger, then chalkboard, then paper.
- 10 minutes a day beats one long weekend session.
- Once your child can copy a cross, both diagonals and a square, they're usually ready to start forming letters.
What Are Pre Writing Strokes?
Occupational therapists usually talk about nine of them, learned in a fairly predictable order: vertical line, horizontal line, circle, cross, right diagonal, square, left diagonal, X and triangle. The list comes from the work of Dr. Keith Beery, who developed a well-known visual-motor test for children. His view was simple: a child should be able to copy these first nine forms comfortably before formal handwriting begins.
One small detail makes a big difference when you watch your child practise – the difference between imitating and copying.
👀 Imitating
Your child watches you draw the stroke, then draws it. They're using your movement as a guide. This always comes first.
✏️ Copying
Your child looks at a finished stroke (that they didn't see being drawn) and reproduces it alone. This is the harder skill, and the one we're aiming for.
So if your three-year-old makes a lovely circle right after watching you, but can't manage one from a picture card yet, that's completely normal. They're at the imitating stage.
Why Pre Writing Strokes Come Before ABC
Think of letters as little buildings and strokes as the bricks. If a child can't yet make a slanting line, the letters A, K, M, N, V, W, X, Y and Z will all feel hard – not because they don't know the letter, but because their hand can't do the movement. That's when you see frustration, tears and the classic "I can't do it!"
There's a reading bonus too. A research review on reading and handwriting describes how forming letters by hand supports letter recognition, so time spent on pre writing strokes now pays off when your child starts to read.
Here's how the pre writing strokes hide inside the alphabet:
| Stroke | Used in letters | Used in numbers |
|---|---|---|
| | | I, L, T, H, E, F, P, B, D, l, i, t | 1, 4 |
| — | E, F, H, L, T, Z, A, e, t, f | 4, 5, 7 |
| ○ | O, C, Q, G, a, c, d, g, o, q | 0, 6, 8, 9 |
| + | t, f (and the joining of lines in T, E, H) | 4, and the plus sign |
| / \ | A, K, M, N, V, W, X, Y, Z, k, v, w, x, y, z | 4, 7 |
| □ △ | Stop-and-turn corners in E, L, D, A, M, W | 4, 7 |
Practising pre writing strokes early gives your child:
- ✋ Pencil controlStarting and stopping in the right place.
- 👀 Eye-hand teamworkWhat occupational therapists call visual-motor integration.
- ↺ Correct directionTop to bottom, left to right – habits that later cut down b/d mix-ups.
- 💪 Hand strengthSmall finger muscles that stop writing from feeling tiring.
- 🌟 ConfidenceSuccess with easy strokes makes them want to try letters.
Pre Writing Strokes by Age: What to Expect
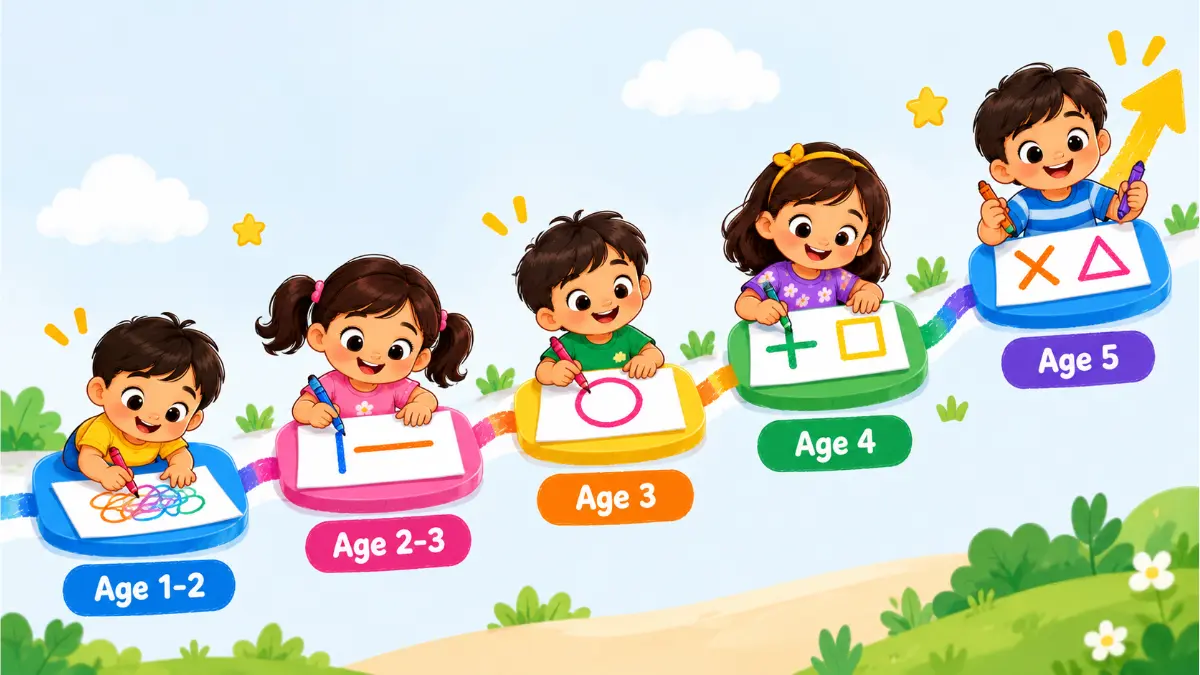
Use this pre writing strokes chart as a friendly guide, not a report card. Children who spend lots of time drawing and playing with their hands often move faster; children who've had less chance to scribble simply need more opportunity, not pressure. The ranges follow common pre-writing milestones used by paediatric therapists.
| Age | What you'll usually see | What to focus on |
|---|---|---|
| 1 – 2 years | Random scribbles, whole-arm movement, crayon held in a fist. | Lots of free scribbling with fat crayons on big paper. No “right way” yet. |
| 2 – 3 years Playgroup / Nursery | Imitates vertical lines, then horizontal lines and a rough circle after watching you. | Draw beside your child. Rain, roads and balloons. Playdough for hand strength. |
| 3 – 4 years Nursery / LKG | Copies |, — and ○ on their own. Starts imitating a cross. | Introduce the cross, sensory trays, chalkboard practice, simple tracing lines. |
| 4 – 5 years LKG / UKG | Copies a cross. Learns the square and both diagonal lines. | Shapes, slides and zigzags. Begin letters made of straight lines (L, T, E, H). |
| 5 – 6 years UKG / Grade 1 | Draws X and a triangle. Hand preference is usually settled. Writes own name. | Full alphabet formation, numbers, writing names and simple words. |
Is Your Child Ready for Pre Writing Strokes?
Most children are ready to start pre writing strokes, in a gentle and playful way, somewhere around two and a half to three. You'll know the time is right when you notice a few of these:
- Enjoys scribbling and asks for crayons or chalk
- Can sit at a table for 5–10 minutes for a favourite activity
- Picks up small things like peas or beads with thumb and finger
- Copies your actions in play, like clapping patterns
- Holds the paper still with the other hand (at least sometimes)
- Can build a small tower of blocks
- Shows interest when you draw or write
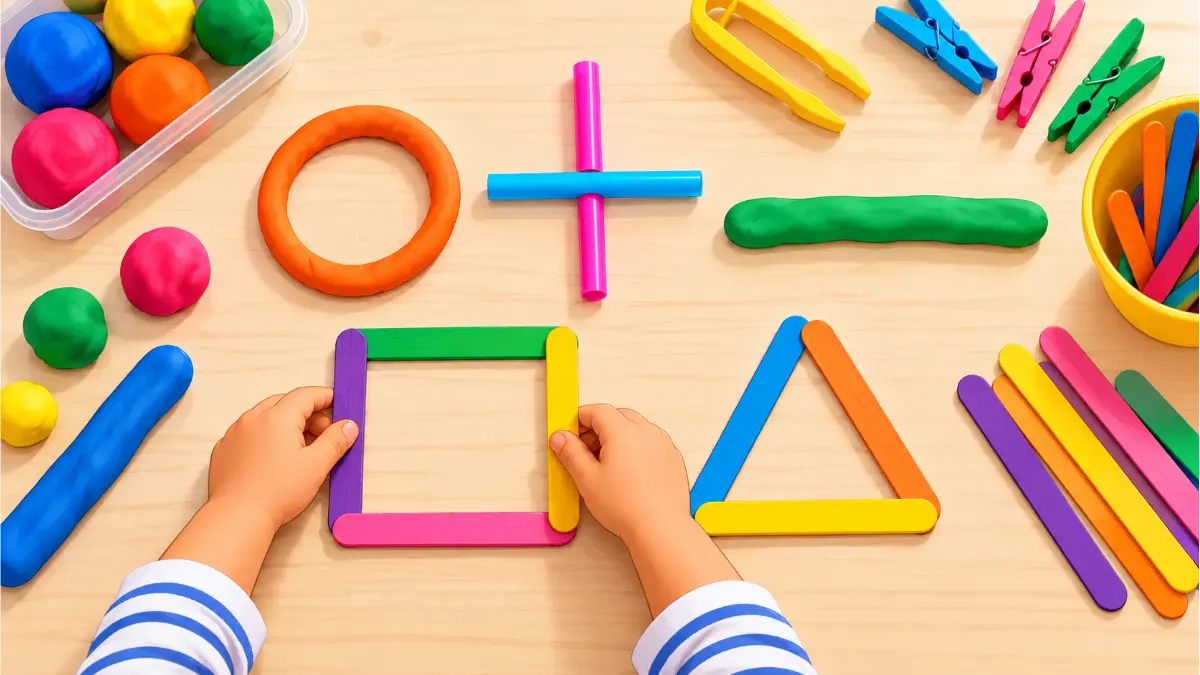
- Can squeeze and roll playdough
🔤 And when is my child ready for ABC?
A good sign is when your child can copy (not just imitate) the harder pre writing strokes, a cross, both diagonal lines and a square, with reasonable control – for most children that's somewhere between 4 and 5. At that point, start with letters made only of straight lines, like L, T, I, E, F and H, before moving to curves and slants. Our uppercase letter tracing worksheets follow exactly that kind of say-trace-write-make routine.
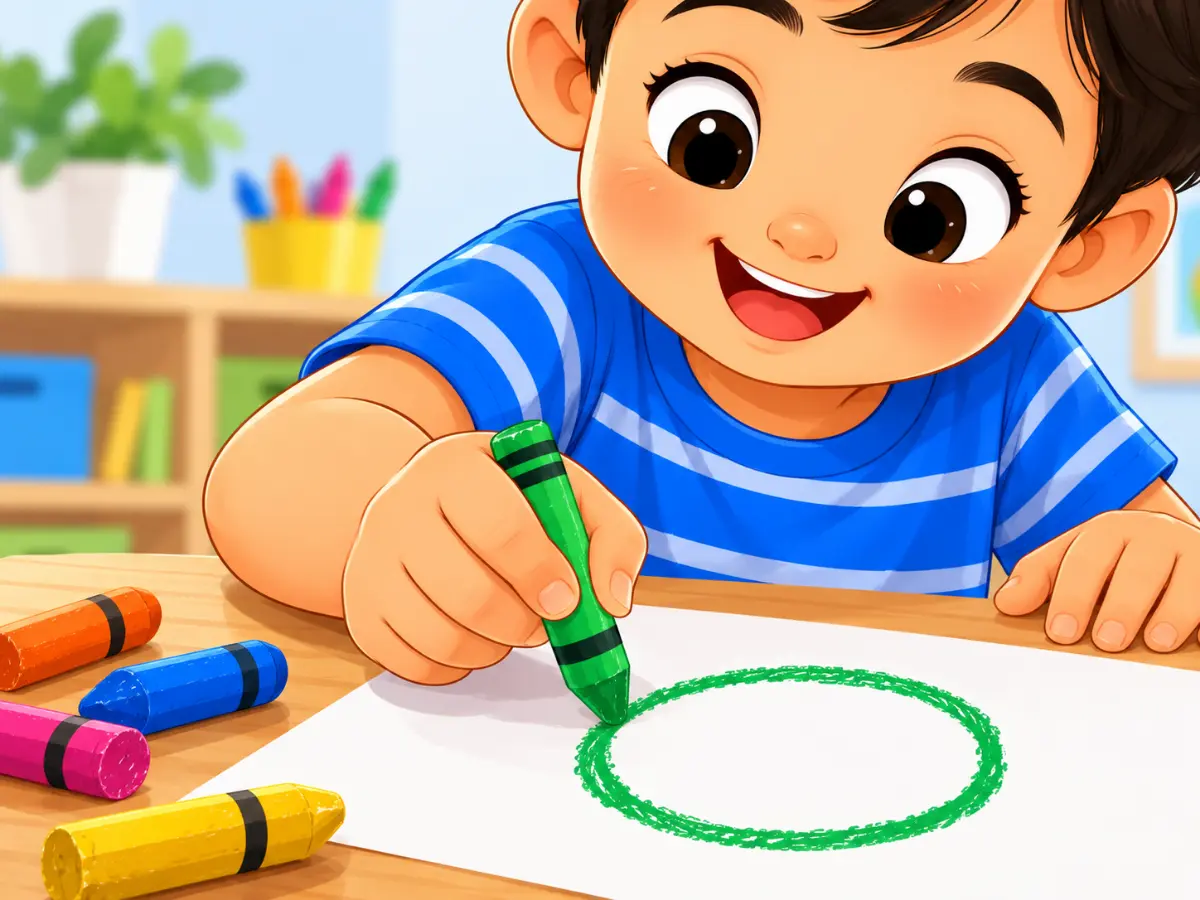
How to Teach Pre Writing Strokes: 5 Simple Steps
The single most useful idea here is big to small. Children learn a movement with their whole body first, then with their finger, then with a tool on a large surface – and only then on a worksheet. Skip straight to paper and you're asking tiny, untrained muscles to do everything at once.
Teach pre writing strokes one at a time, working through these steps. You don't need to finish all five in a day; a stroke might sit at step 2 for a whole week, and that's fine.
Move it with the whole body
Stand up together and “sky write” the stroke with a straight arm – big rain falling from the ceiling, a huge circle like a Ferris wheel. Then make it on the floor with masking tape or chalk and let your child walk, hop or drive a toy car along it.
Feel it with a finger
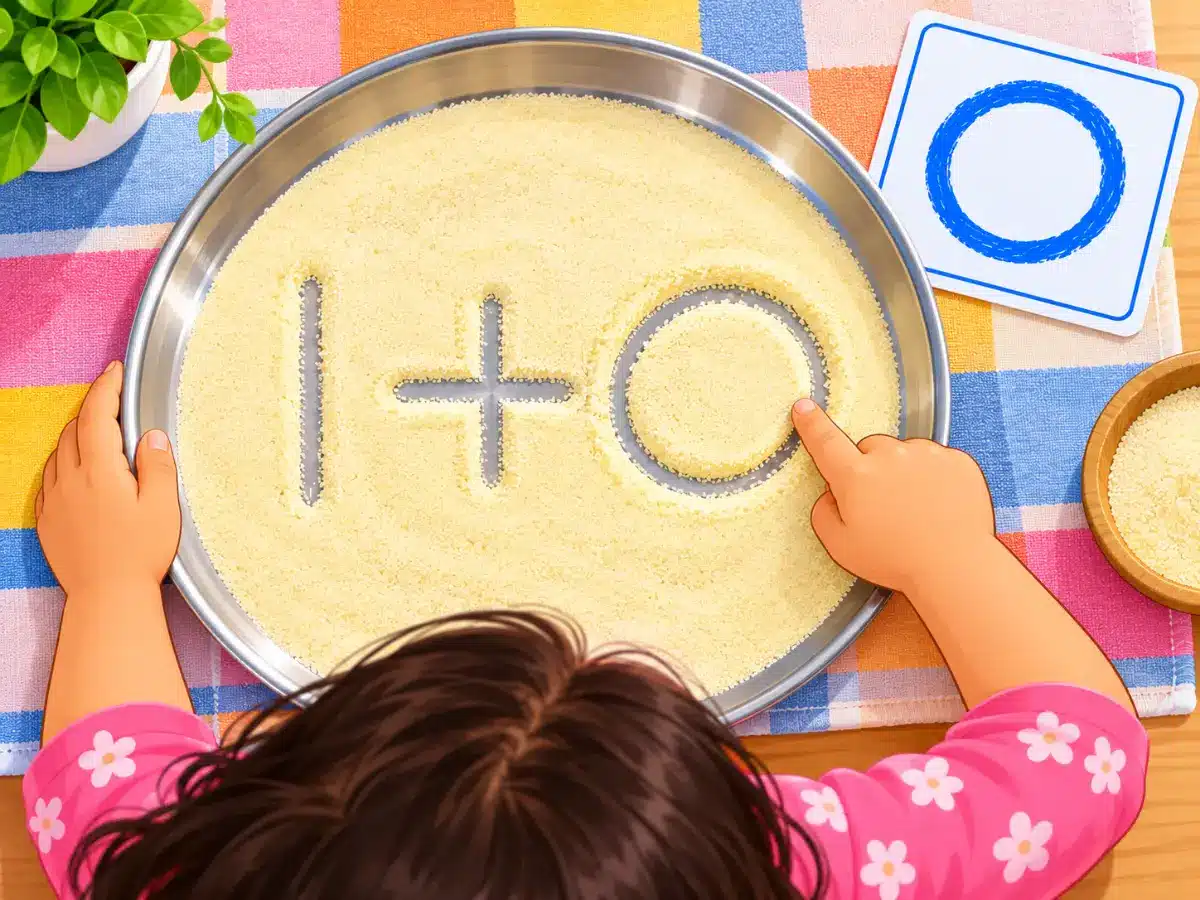
Spread rava, salt or atta on a plate or thali and let your child draw the stroke with one finger. Shake the plate and it's erased. Shaving foam on a table, finger paint, or a zip bag filled with hair gel work just as well.

A plate of rava or salt makes the best eraser-free board for pre writing strokes. Draw it on an upright surface
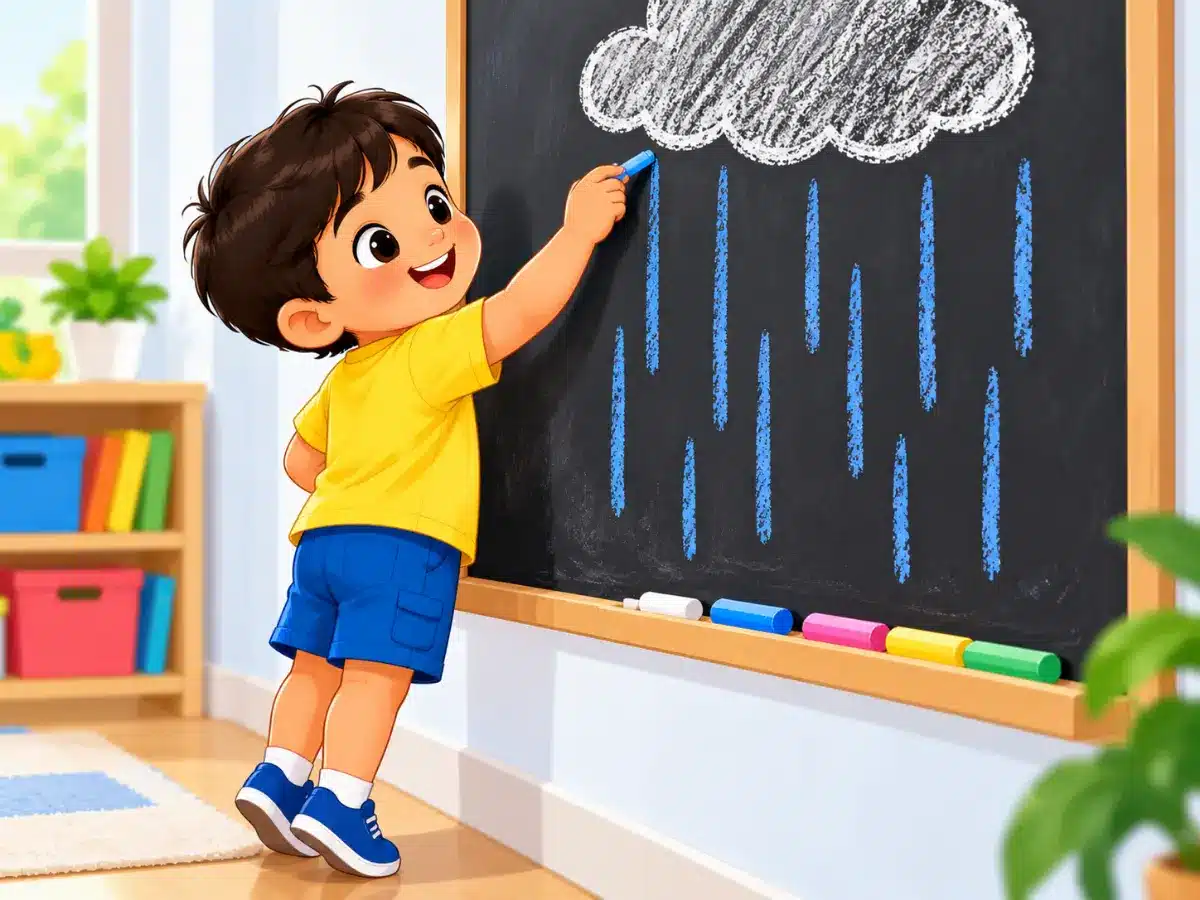
A wall chalkboard, an easel, or paper taped to the wall puts the wrist in a slightly bent-back position that's ideal for writing, and it works the shoulder muscles that keep a hand steady. Ten minutes at a chalkboard is wonderful practice.

Practising pre writing strokes on an upright surface builds shoulder and wrist strength. Trace it with support
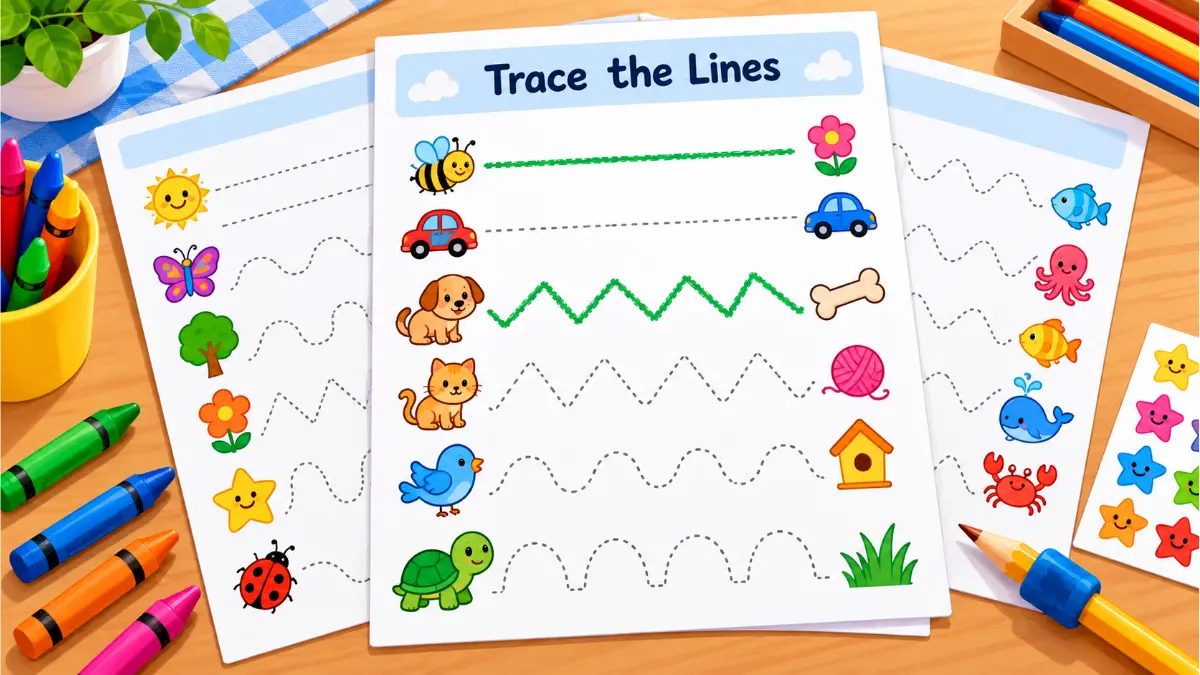
Now bring in paper. Trace pre writing strokes that are thick and short first, with dotted lines with a clear start dot and arrow, then move to thinner and longer ones. Thick crayons and short chalk pieces first; pencils later.
Copy it on their own
The real goal. Draw a stroke on a card, put the card next to blank paper, and ask, “Can you make one just like mine?” Later, try it from memory: “Can you draw a cross?” If they can, that stroke is learned.
💬 Use the same words every time. “Start at the top”, “go across like a road”, “round like a c”. Consistent cues become the voice in your child's head when you're not there – and they carry straight over into letter formation.
12 Fun Pre Writing Activities Using Things at Home
Children practise pre writing strokes far more willingly when each stroke has a reason to exist – rain needs to fall, a car needs a road, a teddy needs a bandage. None of these need special supplies; most use what's already in an Indian kitchen or toy box.
Rainy day |
Draw a big cloud at the top of the page. Your child adds long raindrops falling straight down.
Road builder —
Draw a house on the left and a school on the right. Your child draws the road so the toy car can get there.
Balloon party ○
Draw strings; your child adds a balloon on top of each one. Count them when you're done.
Roti and laddoo shop ○
Roll playdough or atta into round rotis and laddoos. Talk about going “round and round”.
Kite maker +
Two ice-cream sticks or straws make a plus. Then draw the same cross on paper and add a tail.
Teddy doctor +
Draw small cross-shaped “bandages” on a paper teddy wherever it's “hurt”.
Playground slide / \
Draw a ladder; your child draws the slide. Then the other side for a double slide.
My house □ △
A square for the house, a triangle roof, small squares for windows. A full stroke workout.
Treasure map X
Hide a small toy and draw a simple map. X marks the spot – your child draws the X.
Water painting All
A brush and a cup of water on a floor tile or wall outside. Strokes “disappear”, so kids happily repeat them.
Rangoli lines All
Use chalk or flour to make simple rangoli-style patterns of lines, dots and circles on the floor.
Tong transfer Grip
Move cotton balls or chana from one bowl to another with tongs or a clothes peg. Builds finger strength.
Shape-based play links nicely with pre writing strokes too. If you'd like more ideas for circles, squares and triangles, read our guide on how to teach shapes to preschoolers.
Pencil Grip and Posture for Pre Writing Strokes
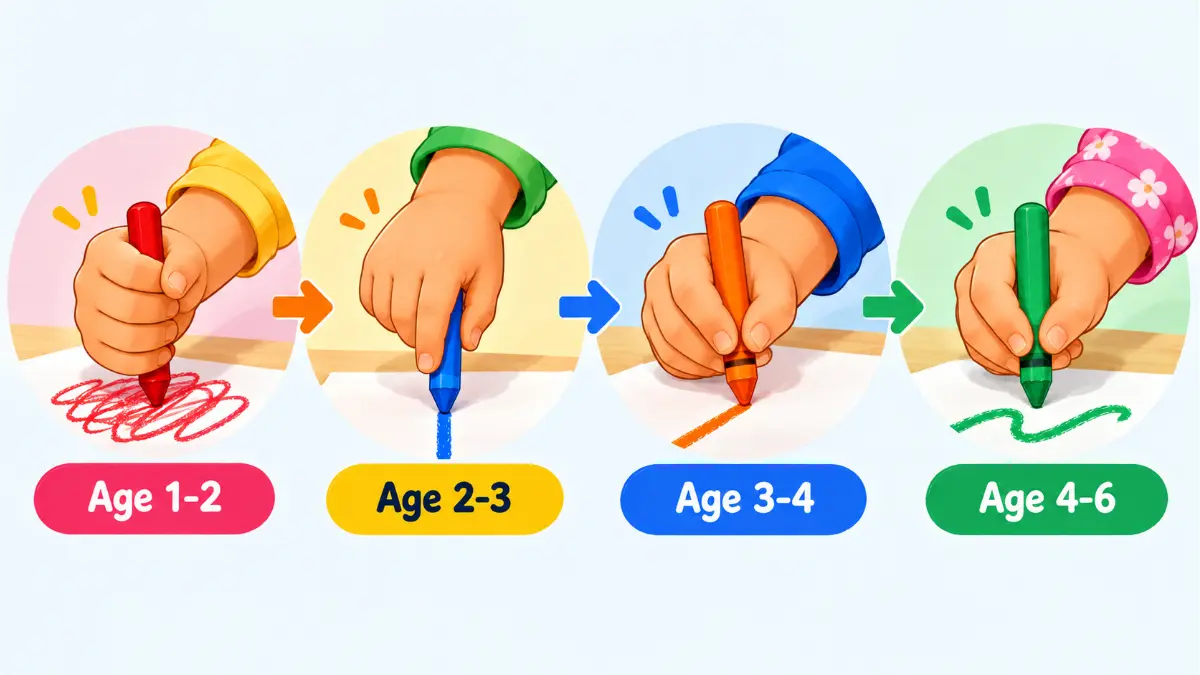
Grip develops on its own timetable, much like the strokes. A two-year-old holding a crayon in a fist is doing exactly what a two-year-old should. Forcing a “proper” grip too early usually just makes a child tense.
Fist grip
Crayon held in the whole fist, movement comes from the shoulder.
Fingers-down grip
Palm faces the paper, fingers point down the crayon.
Early tripod
Thumb and two fingers hold the crayon, but the whole hand still moves.
Mature tripod
Relaxed three-finger hold; the fingers do the moving, the wrist rests.
Little tricks that help grip without nagging:
- Break the crayons. A short piece (about 3–4 cm) can only be held with the fingertips, so the tripod grip happens naturally.
- Use chunky triangular crayons or short chalk before moving to pencils.
- Give your child a small ball of cotton or a tiny eraser to hold with the ring and little fingers while drawing – it keeps those fingers tucked away.
- Build hand strength through play: playdough, tearing paper, peeling stickers, pinching clothes pegs.
🪑 The comfortable sitting checklist
- Feet flat on the floor (or on a box or stack of books)
- Table at about tummy height – elbows rest on it without shoulders lifting
- Back against the chair, sitting up but not stiff
- The non-writing hand holds the paper still
Free Pre Writing Strokes Worksheets to Print Today
Once your child has tried the pre writing strokes with their body, a finger and a chalkboard, a worksheet is the perfect next step. Here's how our free collections line up with the stages in this guide:
✏️ Print, trace, then draw on your own
Every Kidzolearn worksheet is made for children aged 3 to 7 – ready for Nursery, LKG, UKG and home learning.
⭐ Get more out of every worksheet
- Print on A4 and slide it into a clear sheet protector. Use a dry-erase marker and you can reuse the same page all week.
- Trace each stroke once, saying your cue words aloud together.
- Flip to the back or a blank page and draw the same stroke three times with nothing to follow.
- Finish with a sticker or a star – small rewards, big smiles.